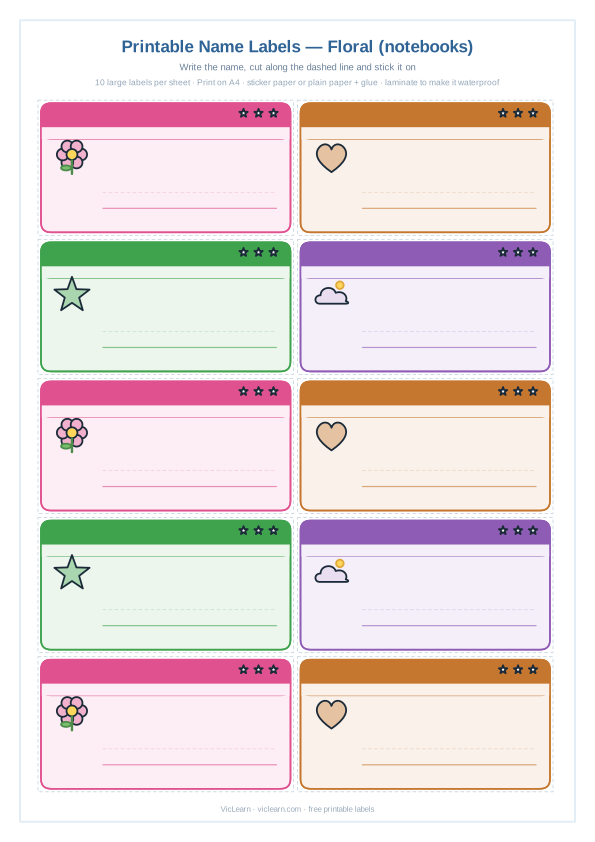

Every classroom and kitchen table runs differently, so Floral Name Labels for notebooks — Free Printable PDF is built to work with almost no setup: print, hand it over, and go.
File the finished sheets by date. Comparing week one with week four says more than any grade. If it helps, reuse it next week with a different colour pen.
Download PDF (A4)
Download PNG
Print now
What is inside
A full A4 sheet of colour name labels with cut lines: coloured header band, illustration and a writing line for the child’s name.
How to use it
- Download the PDF and print it on A4 or US Letter paper (fit to page).
- For a whole class, print one copy and photocopy it — the lines stay crisp because the file is vector, not a photo.
- Laminate it or slip it into a plastic sleeve to reuse with dry-erase markers.
Free for classroom and home use. Please do not resell the file.
Everything included in this set
Each sheet below is part of the same set. Open any of them to print or download the PDF — no sign-up, no watermark.
- Unicorn Name Labels for notebooks — Free Printable PDFOpen sheet →
- Space Name Labels for notebooks — Free Printable PDFOpen sheet →
- Animals Name Labels for notebooks — Free Printable PDFOpen sheet →
- Rainbow Name Labels for notebooks — Free Printable PDFOpen sheet →
- Floral Name Labels for pencils — Free Printable PDFOpen sheet →
- Unicorn Name Labels for pencils — Free Printable PDFOpen sheet →
- Space Name Labels for pencils — Free Printable PDFOpen sheet →
- Animals Name Labels for pencils — Free Printable PDFOpen sheet →
- Rainbow Name Labels for pencils — Free Printable PDFOpen sheet →
Which level should I print?
Start one level below where the child is comfortable. Confidence first, difficulty second.
| Level | Best for | What to print first | Signs it is too hard |
|---|---|---|---|
| Pre-K (3–4) | Pencil control and thick strokes | The simplest sheet in the set | Grips hard or drifts off the line |
| Kindergarten (5) | Single letters and numbers | Dotted tracing with direction arrows | Reverses letters often |
| 1st grade (6) | Words and short sentences | Double-ruled line sheet | Letters escape the baseline |
| 2nd grade (7+) | Fluent and joined writing | Free practice sheet | Tires before finishing a row |
How to use these at home or in class
- Print one sheet, not the whole set. A single page finished beats five pages abandoned.
- Sit on the child’s non-writing side so your hand never blocks the model.
- Trace the first item together out loud, then let the child finish the row alone.
- Stop at the first sign of fatigue — 6 to 8 minutes is a full session at this age.
- Keep finished sheets in a folder; re-printing the same page in two weeks shows real progress.
Print checklist (30 seconds)
- Paper: plain A4 or US Letter, 90–120 g/m² so markers do not bleed through.
- Printer setting: “Actual size” / 100% — “Fit to page” shrinks the guide lines.
- Black & white is enough; save colour ink for the reward pages.
- Slide the page into a plastic sleeve to reuse it with a dry-erase marker.
Frequently asked questions
Are these floral name labels for printables free?
Yes. You can view, print and download the PDF with no sign-up and no watermark.
Can I use them in my classroom?
Yes — print them for your class or your own children. This set has 10 variations to rotate through the year.
How much practice per day?
Six to ten focused minutes a day beats one long session at the weekend.
Do I need a colour printer?
No. Every sheet is designed to print clearly in black and white.
Why this sheet works
A labelled pencil comes home. An unlabelled one becomes someone else’s. Beyond the practical side, writing their own name on each label is early handwriting practice with a real reason behind it — the child is not filling a worksheet, they are claiming their things.
How to use it, step by step
- Print on plain paper for a test run, then on adhesive A4 sheets (or use clear tape over paper labels).
- Cut along the outer line only; the inner line is the fold guide for pencils.
- Let the child write the name — even shaky letters. Ownership matters more than neatness.
- Wrap the label around the pencil and press the ends together, or stick it flat on notebooks and boxes.
- Cover with a strip of transparent tape so hands and pencil cases do not rub the ink off.
Three ways to make it harder (or easier)
- Younger child: you write the name in dotted letters and they trace over it.
- Same age, harder: they write first name and surname initial in the same space.
- Classroom set: print one sheet per table group and let students hand them out by name.
Mistakes that ruin the activity
- Printing with “Fit to page” — labels shrink and no longer wrap around a standard pencil.
- Using a water-based pen on glossy sticker paper; the name smudges the first day.
- Labelling everything at once. Do the pencil case first and the rest as items appear.
Age and level guide
| Age | What to expect | Time on task | Ready for more when |
|---|---|---|---|
| 3–4 | Needs an adult reading each instruction out loud | 5–8 minutes | The child points to the answer before you finish reading |
| 5–6 | Works alone in short bursts, asks to check | 8–12 minutes | Two sheets in a row with no help |
| 7–8 | Reads and solves independently | 12–18 minutes | Finishes early and looks bored |
| 9+ | Wants a rule to bend or a timer to beat | 15–20 minutes | Starts inventing their own version |
Frequently asked questions
What paper should I use?
Adhesive A4 label sheets are easiest, but plain paper plus clear tape works and costs almost nothing.
Will it fit a normal pencil?
Yes, if you print at 100% actual size. The label wraps a standard hexagonal pencil with a small overlap.
Can I use it on water bottles?
Yes, but cover the whole label with wide transparent tape so it survives washing.
Explore the topic
More in this topic
Get the complete pack of this set — free
One email, one link, all the sheets of this topic in a single PDF. No spam, unsubscribe in one click.
What you need to print this well
- Bright white printer paper (24 lb)Markers stop bleeding through at 24 lb / 90 g.
- Dry-erase pocketsTurn one printed sheet into unlimited practice.
- Triangular beginner pencilsFixes the grip before the handwriting habit sets.
- Laminator + pouchesFor the charts and cards you will reuse all year.
Links to Amazon. If you buy through them we earn a small commission at no extra cost — it keeps every sheet on this site free.
Want the printer-ready mega packs? See the printable packs.